If you have ever wished you could see the invisible world of radiation, a cloud chamber is one of the most satisfying kitchen-table physics projects on Earth. It turns tiny, fast-moving particles into bright little streaks you can watch in real time, like microscopic shooting stars.
This guide walks you through a classic dry ice plus rubbing alcohol cloud chamber. It is inexpensive, genuinely educational, and safe when you follow a few sensible rules. You will not be “making radiation.” You will be revealing the particle traffic already passing through your room, largely from cosmic rays and natural background sources, depending on your setup and conditions.
What a cloud chamber shows you
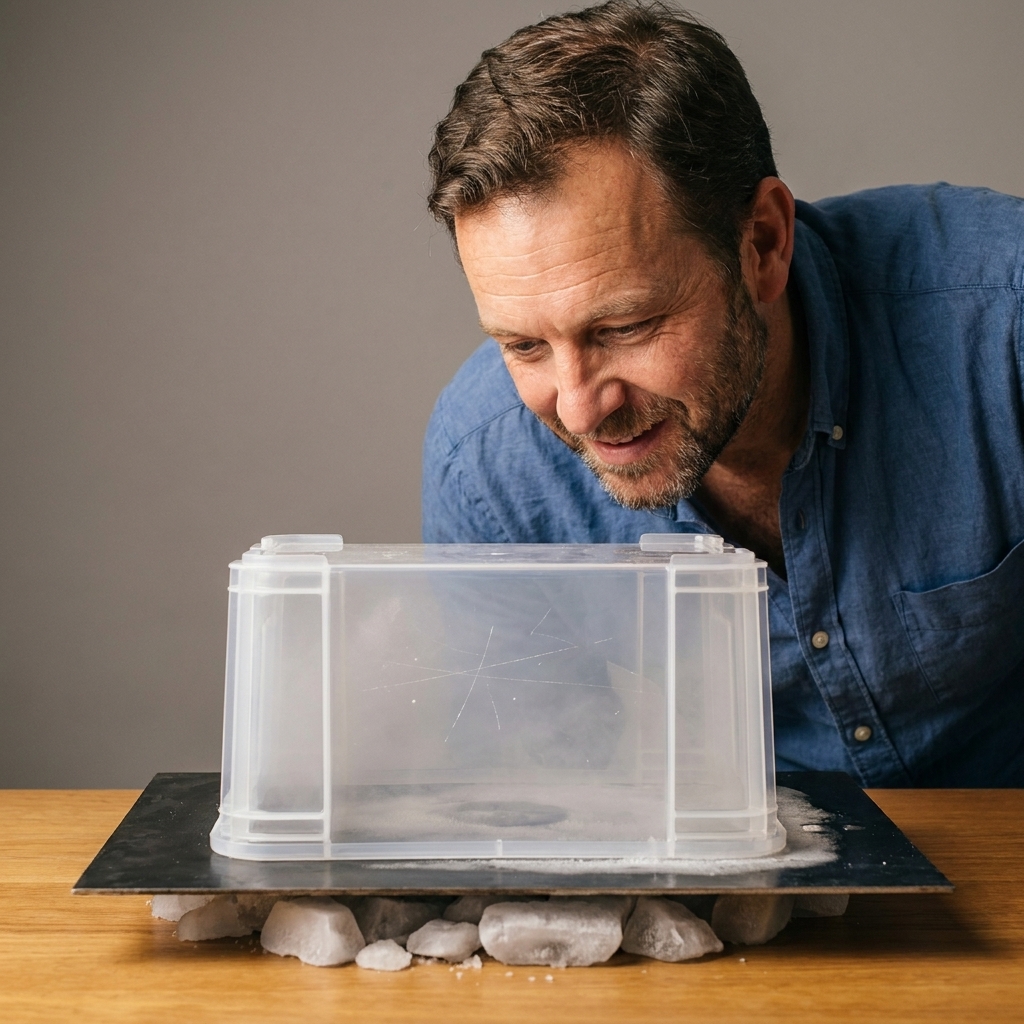
A cloud chamber is a detector that uses a supersaturated vapor. When a charged particle zips through the chamber, it knocks electrons off air molecules, leaving a trail of ions. Those ions act like tiny “seeds” that alcohol vapor can condense on, forming a line of droplets. With the right lighting, those droplet lines look like crisp tracks.
What you might see
- Thin, long, straight tracks: often fast particles like muons from cosmic rays. Some energetic beta electrons can also look long and fairly straight, so treat identifications as “likely” rather than certain.
- Wigglier or kinked thin tracks: often electrons (beta particles) that scatter more easily. Without a magnetic field you will not measure charge or energy, so use patterns as clues, not verdicts.
- Shorter, thicker tracks: frequently alpha particles (heavier and more ionizing), if you bring a mild source near the chamber. Many people skip sources and still see plenty of tracks.
- Sudden kinks or forks: scattering events, or particles interacting in the chamber. Rare, but thrilling.
One important note: the chamber mainly reveals charged particles. Gamma rays are uncharged, so you usually detect them only indirectly when they knock loose an electron that then leaves a track.
Safety first (mostly dry ice)
The “hazards” here are practical, not spooky. Dry ice is extremely cold, and high-percentage isopropyl alcohol is flammable. Treat both with respect and you will be in great shape.
- Dry ice: Use insulated gloves or tongs. Never seal dry ice in an airtight container. It sublimates into CO2 gas and pressure can build.
- Ventilation: Work in a well-ventilated area. CO2 can displace oxygen in a confined space, so avoid small closed rooms, car interiors, and tightly shut garages.
- Isopropyl alcohol: Use 91% or 99% if possible. Keep away from flames, hot plates, and sparks. Cap the bottle promptly.
- Containers and kids: Avoid glass containers that could crack from thermal stress. If kids are helping, make “tongs and gloves only” the rule for dry ice.
- Radiation sources: You do not need any added source. If you choose to use a legal, known, low-activity item, follow reputable guidance and local laws, and keep exposure brief and controlled. Do not use unknown or industrial sources.
Materials
You can build a working chamber with common items. I will include “nice-to-have” upgrades that make tracks easier to spot.
Essentials
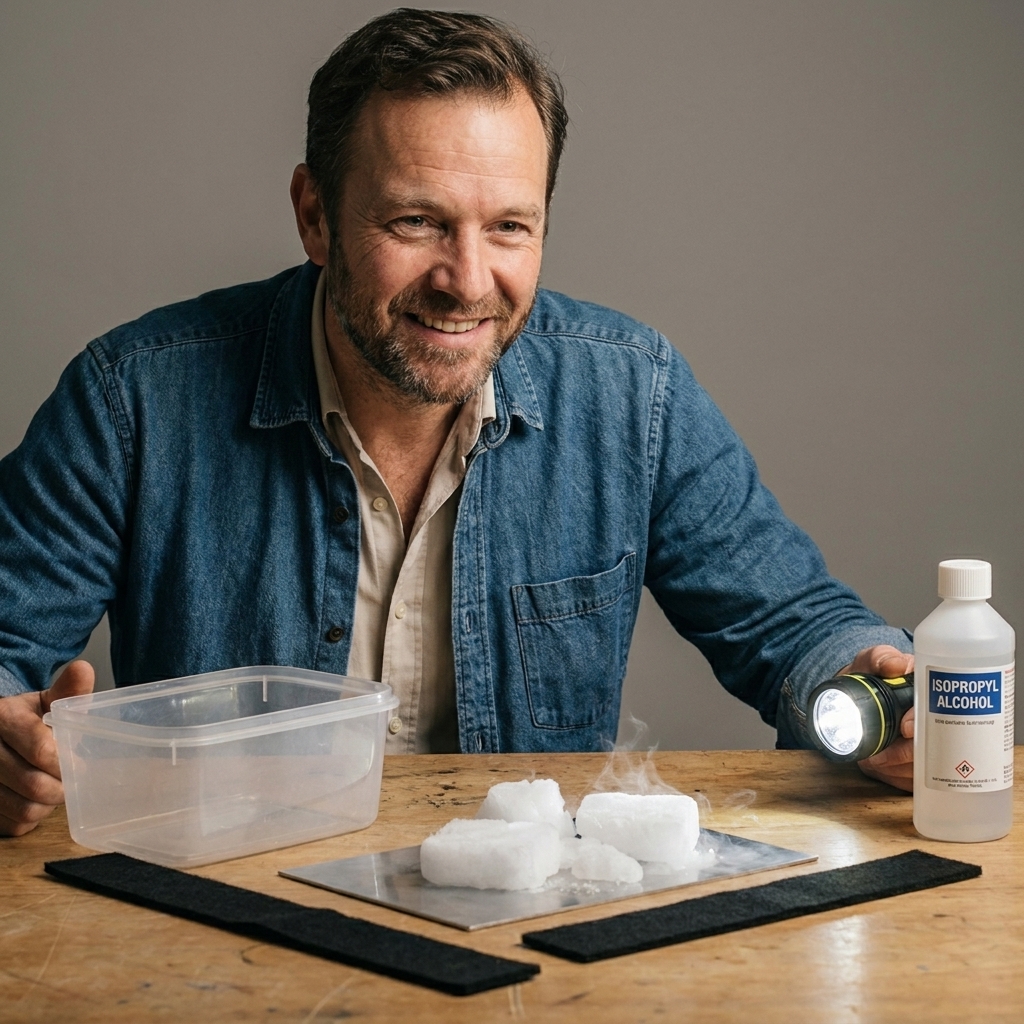
- Dry ice: a few pounds, ideally in blocks or thick slabs
- Clear container: a plastic food container or small clear acrylic box that can sit upside down and seal reasonably well against a plate. A shallower container often works better because the active layer is close to the cold plate and easier to keep stable.
- Metal base plate: a flat sheet of aluminum or steel, dark if possible (a black anodized aluminum plate is fantastic). What matters most is good thermal conductivity and solid contact with the dry ice.
- Isopropyl alcohol: 91% or 99%
- Absorbent liner: felt strip, sponge, or thick paper towel to hold alcohol along the inside “top” (which becomes the ceiling when inverted)
- Flashlight: a bright LED flashlight works well
Helpful upgrades
- Black background: black paper or cloth under the metal plate improves contrast
- Small spacers: coins or thin cardboard to level the plate and help seal, and to keep the container from getting too cold on the side walls
- Insulation tray: a foam cooler lid or thick styrofoam to sit the dry ice in
- Magnifier or phone camera: helps you spot faint tracks
How it works
You are going to create a very cold floor (the metal plate on dry ice) and a slightly warmer ceiling soaked with alcohol. Alcohol vapor drifts downward, hits the cold region, and becomes supersaturated. That is the sweet spot where particle tracks appear.
Step-by-step
1) Prepare the cold stage
Set your dry ice in a shallow tray or on a thick insulating surface. Place the metal plate directly on top of the dry ice. You want strong contact. If the plate wobbles, adjust with small pieces of dry ice or spacers so it sits flat.
Wait a few minutes for the plate to get extremely cold. Time varies with plate size and dry ice contact. A good clue is when the setup looks “settled” and the plate is clearly cooling fast. Do not touch it with bare skin.
2) Make the alcohol ceiling
Take your clear container and line what will become its ceiling (the inside bottom if you are going to invert it) with felt or a folded paper towel strip. The goal is to hold alcohol like a wick.
Moisten the liner with isopropyl alcohol. Think “wet but not dripping.” If it is pooling, you used too much. Many builders find it helps to keep the liner near the top edges rather than covering the whole ceiling, since that reduces dripping and keeps the viewing area cleaner.
3) Invert and seal
Flip the container upside down onto the cold metal plate. Press gently so the rim contacts the plate. A decent seal helps keep a stable vapor layer inside.
Once it is in place, try not to bump it. Vibrations and repeated handling stir the air and can blur tracks into general fog.
4) Set up the lighting
Turn off bright overhead lights if you can. Shine your flashlight from the side at a low angle, skimming just above the metal plate. This grazing light makes droplets sparkle, which makes tracks pop.
5) Wait for the active layer
Give it 3 to 10 minutes. You are waiting for a thin foggy layer to develop just above the plate. Tracks typically appear in the bottom 1 to 2 centimeters of the chamber.
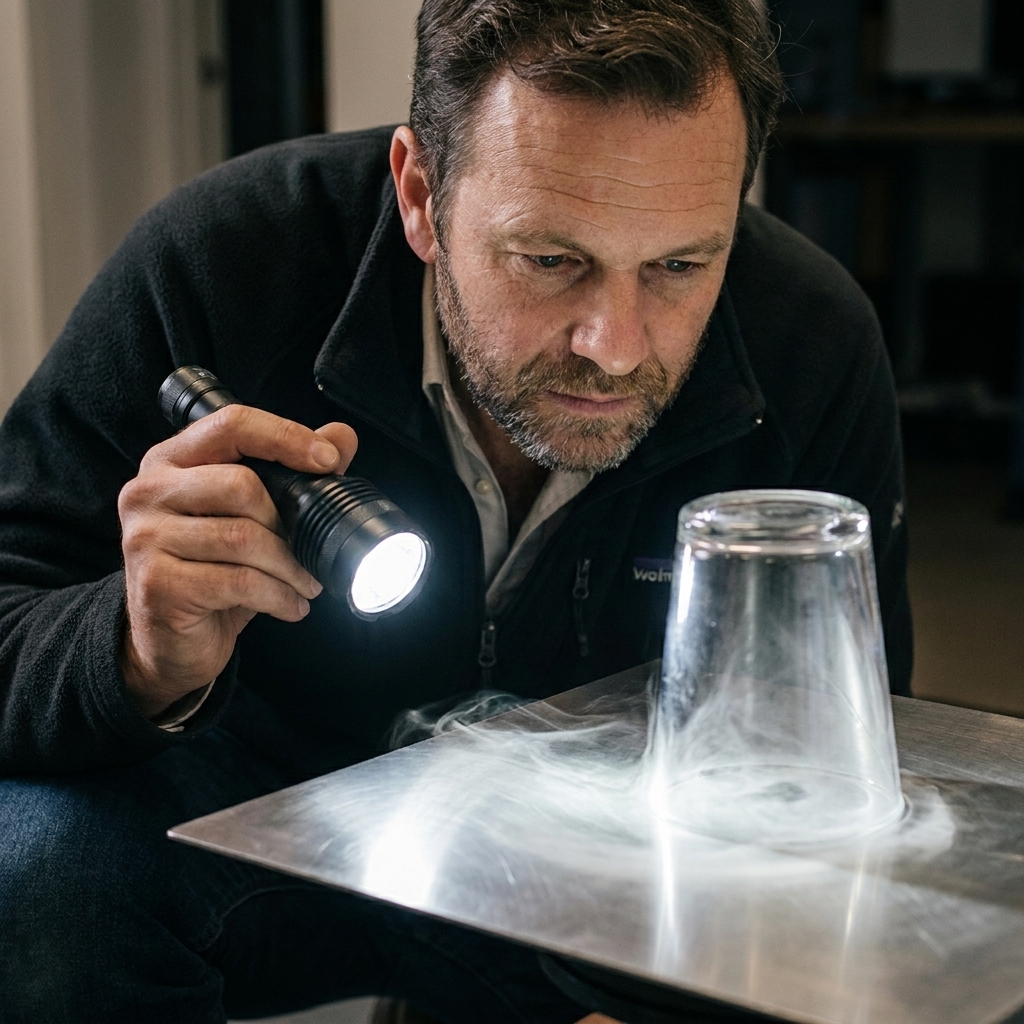
Spot real tracks
At first, your eyes might interpret every swirl as “radiation.” Totally normal. Here is what helps:
- Tracks are fast: they appear and vanish in a second or two, like a quick stroke of chalk that fades.
- Tracks are linear: even when they curve, they look like a line, not a billow.
- Convection looks like weather: slow rolling clouds or waves usually mean your temperature gradient is off, or the chamber is being disturbed.
- Best viewing zone: focus on the thin layer right above the plate, not the whole container.
If you have a phone, try recording video with the lens close to the side of the chamber and the flashlight still at a shallow angle. Slow-motion playback can make faint tracks obvious.
Troubleshooting
No tracks at all
- Not cold enough: Ensure the plate is in solid contact with dry ice. A plate with good thermal conductivity (aluminum is great) and good contact helps more than sheer thickness. Give it more time to chill.
- Alcohol too weak: 70% rubbing alcohol often disappoints because it contains too much water. Use 91% or 99%.
- Lighting: Adjust the flashlight angle so it skims the plate. This is the single most common fix.
Too much fog
- Too much alcohol: Wring out the liner slightly or use less next time.
- Warm plate: If your dry ice is mostly gone or not contacting well, you can get messy convection instead of a clean supersaturated layer.
- Drafts or bumps: A fan, vent, or repeated jostling can stir the chamber and ruin the stable layer. Let it settle and keep hands off the container.
Fog layer forms, but tracks are faint
- Increase contrast: Use a darker plate or put black paper underneath the metal plate.
- Reduce ambient light: Dim the room and let the flashlight do the work.
- Stabilize: Let it run 5 more minutes. Cloud chambers often “settle in.”
Water droplets or frost on the walls
- Humidity: High humidity can add water condensation. Using higher purity alcohol and keeping the container dry helps.
- Walls too cold: If the walls are getting very cold, you may be overcooling the entire chamber. Slightly lift the container rim with thin spacers so the cold is concentrated at the plate.
What you are seeing
Even in a quiet room, Earth is not “particle-free.” A big contributor is cosmic rays from space. When they hit the atmosphere, they create showers of secondary particles, including muons, that reach the ground and pass through you and your cloud chamber every second.
You can also see tracks from natural radioactivity in building materials and the air. The exact track rate depends on altitude, local geology, chamber size, and how well the temperature gradient and lighting are tuned.
My favorite classroom moment with a cloud chamber was watching students realize the universe is not just out there. It is passing through the room, all the time.
Optional experiments
Try different lighting
Swap a narrow-beam flashlight for a wider one, or use two flashlights from opposite sides. Better lighting often doubles the “wow” factor without changing the chamber at all.
Change the plate color
If you have two plates, compare a shiny metal surface to a dark one. Dark backgrounds usually make faint tracks easier to see.
Measure track rate
Record 60 seconds of video once the chamber is stable. Count tracks per minute, then repeat after the dry ice has been running for 15 minutes. You will learn quickly how temperature affects sensitivity.
Altitude comparison
Run the same setup at sea level and at a higher elevation. Many people notice more tracks at higher altitude because there is less atmosphere above you to absorb cosmic ray secondaries.
Cleanup and storage
- Let dry ice vanish safely: Leave it in a well-ventilated area in an open container. Do not put it in a sealed jar or tightly closed cooler.
- Vent the chamber: Lift the container and let any alcohol vapor disperse.
- Wipe the plate: A little alcohol residue is normal. Clean with a damp cloth, then dry.
- Store alcohol properly: Cap it and keep it away from heat sources.
FAQ
Do I need a radiation source to see tracks?
No. A well-tuned chamber often shows cosmic ray tracks on its own. Added sources are optional and not necessary for the core experience.
Is this dangerous?
When people get into trouble, it is usually from handling dry ice without protection, doing the project in a poorly ventilated confined space, or treating alcohol casually near ignition sources. The chamber itself is a passive detector and does not create radiation.
Why does 91% or 99% alcohol work better than 70%?
Cloud chambers depend on alcohol vapor. Lower-percentage rubbing alcohol contains more water, which does not vaporize and condense the same way. Too much water tends to produce messy droplets and weak tracks.
Can I use regular ice instead of dry ice?
Regular ice is not cold enough to create the strong temperature gradient you need. Dry ice, at about −78.5°C, is the reason this works on a tabletop.
What particles am I most likely seeing?
At ground level, many of the long straight tracks are consistent with muons from cosmic ray showers. You may also see electrons (beta particles) and occasional interactions. Without additional equipment, treat track identification as an educated guess based on thickness, length, and how much a track scatters.
One last tip
If you build this with a friend or family member, give them one job: “track spotter.” Have them call out what they see while you adjust lighting and timing. Cloud chambers reward patience, and sharing the moment makes the first clear track feel like a tiny scientific discovery.
And if you name your chamber, I fully support it. My golden retriever, Quark, does not care about particle physics, but he is deeply invested in any project that involves sitting near a cool foggy box.